How to Create Dynamic Gutenberg Blocks in WordPress
Explore the full power of dynamic Gutenberg blocks for custom WordPress solutions.
Table of Contents
Key Takeaways
- Dynamic blocks render content at runtime, enabling real-time updates like user listings or latest posts.
- Unlike static blocks, dynamic blocks use PHP (render.php) instead of save.js for frontend output.
- The render.php file replaces save.js, giving developers full control over server-side rendering logic.
- Backend rendering via @wordpress/core-data improves editor performance over ServerSideRender
- Ideal for building scalable, data-driven WordPress solutions that separate editorial control from code logic.
Dynamic blocks enable powerful ways to create interactive experiences in WordPress. Unlike static blocks, dynamic blocks generate content and structure via code when rendered on the site’s frontend. This dynamic nature is essential for any block that changes often or depends on real-time data.
Some examples of dynamic blocks include displaying recent posts, latest comments, API-driven content, and other user-specific content.
Our previous article explored how to develop custom Gutenberg blocks to create unique layouts and interactions that align with your brand identity and user needs. However, we only covered static custom blocks there.
In this article, we’ll explore dynamic Gutenberg block development in detail. You’ll learn how to create them from scratch, covering both their frontend and backend aspects.
Excited? Let’s get started!
Static Blocks vs. Dynamic Blocks
Before we begin, it’s crucial you learn the differences between static and dynamic blocks. However, if you’re already familiar with them, please skip to the next section.
Let’s look at default WordPress blocks to understand the difference between static and dynamic blocks.
First, consider the Paragraph or the Quote block. When you edit them, their content and settings are stored in the database. In other words, a static block’s HTML markup is saved to the post content. WordPress uses these data points to render the blocks on the website.

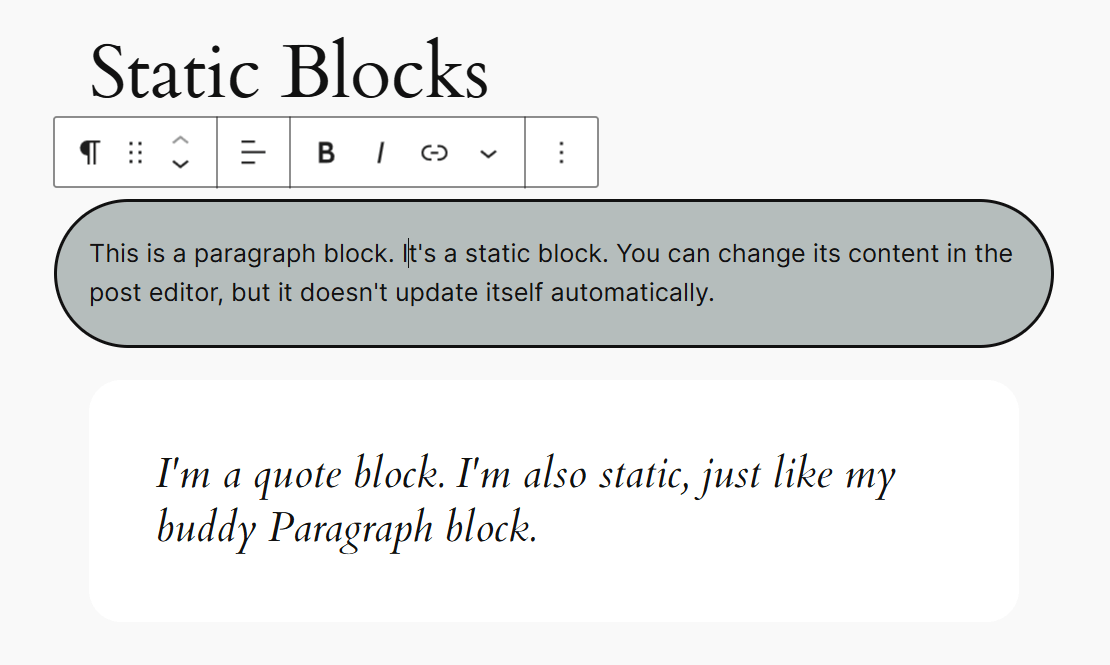
Static Blocks in the WordPress post editor
Here’s what the static block’s HTML content looks like in the post’s code editor:
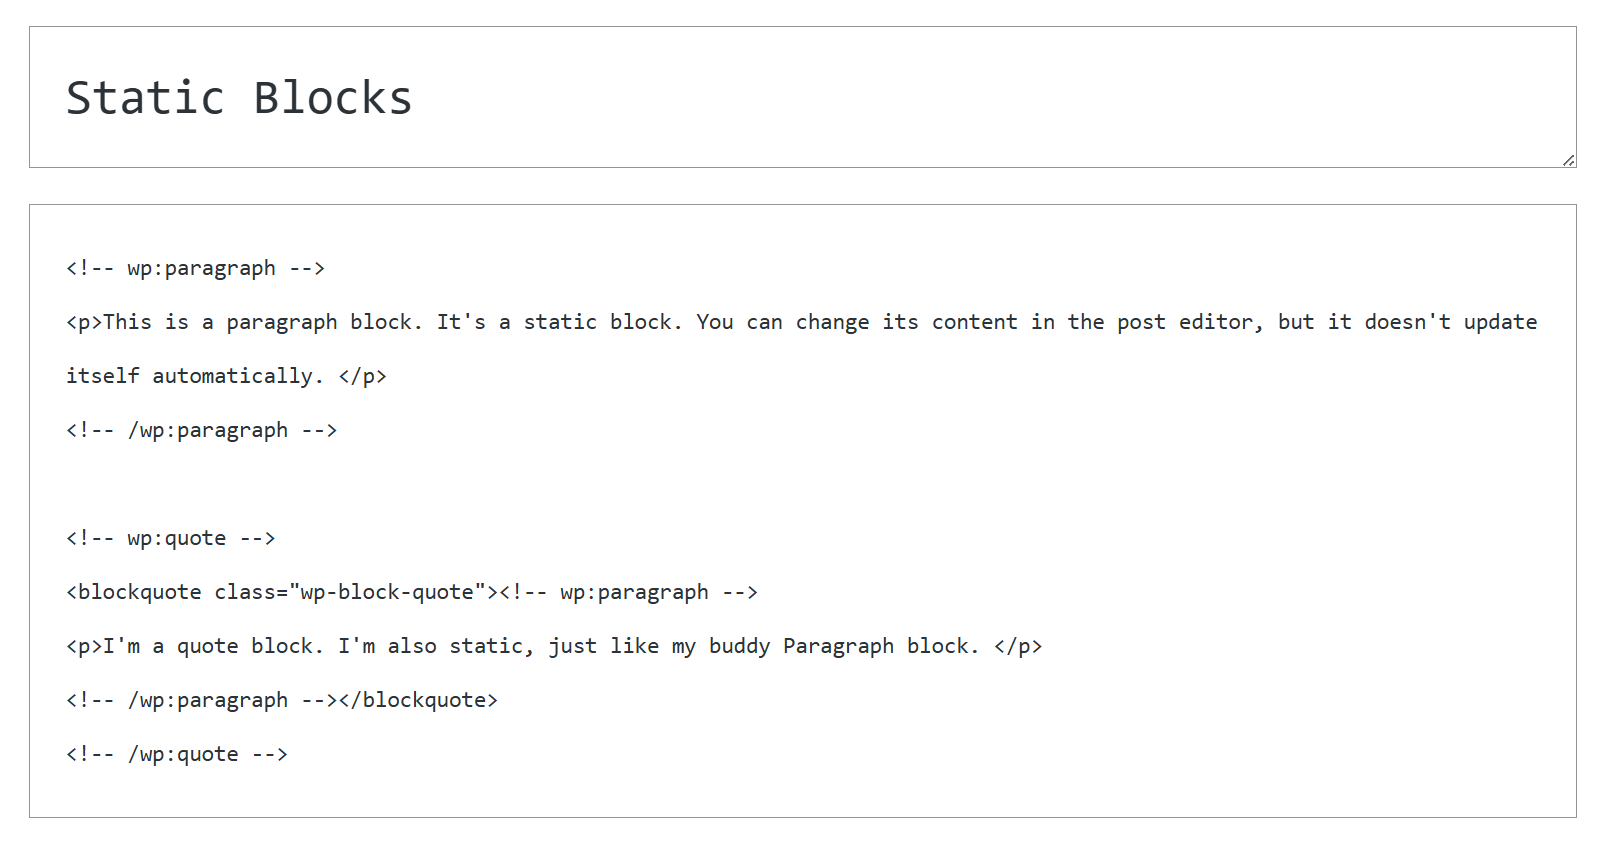
Example of a static block’s HTML content
For the paragraph block, you can see the <!-- wp:paragraph --> opening tag, indicating the block’s namespace and name. It has an appropriate closing tag added at the end. Likewise, you can see the same for the quote static block.
If you make any changes to the static block’s design inside the Gutenberg block editor, you will also see them reflected in its HTML content.
The paragraph static block with custom design
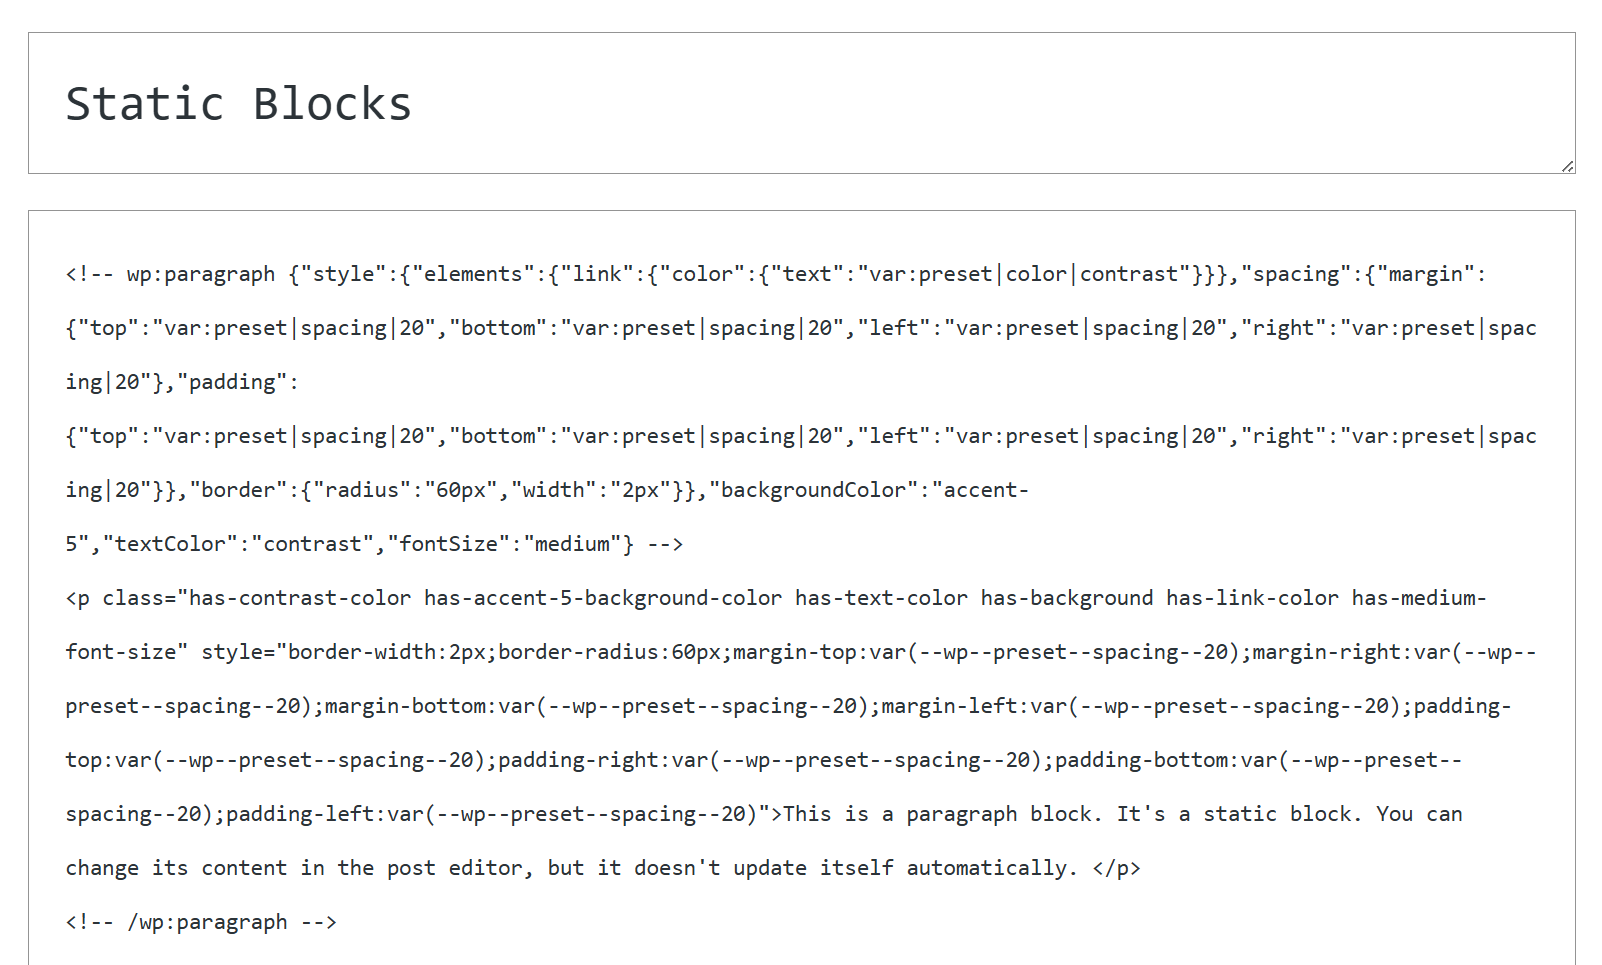
HTML content of the custom design paragraph static block
Note the various HTML tags and attributes (e.g., style, color, padding, margin, border, etc.) added to the paragraph block’s HTML content. What you see here in the code is what you get with static blocks.
Next, consider the built-in Latest Posts block. Right now, you may have a certain number of posts that are "latest." However, when you publish new posts, this list of latest posts must also be updated. It’s a hassle to update them manually every time you publish new posts. That’s where dynamic blocks help.
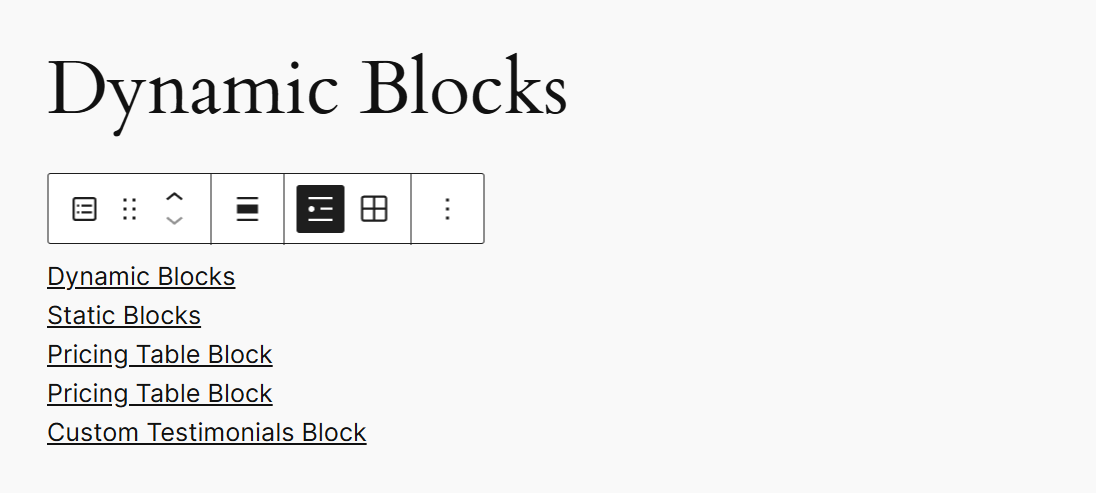
The Latest Posts dynamic block in the WordPress editor
But when you look at its HTML content, you will only see the block’s opening comment tag.
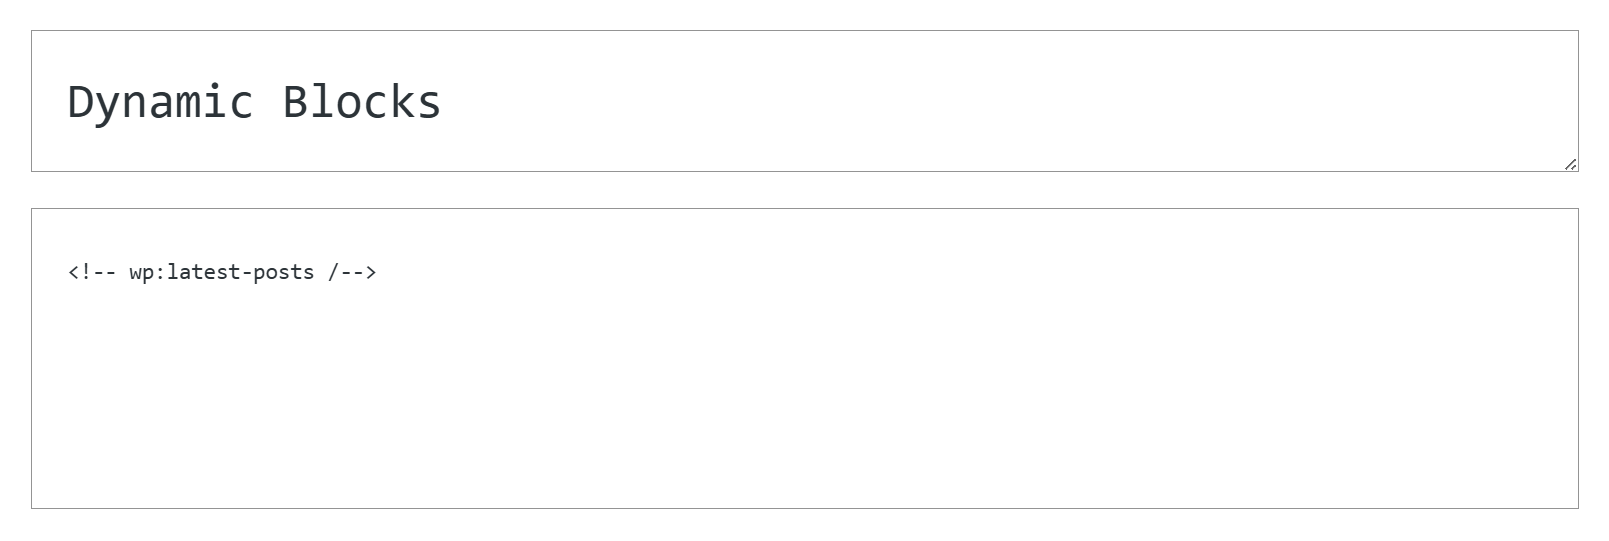
A dynamic block’s HTML content
Whenever you publish a new post, the Latest Posts block will automatically update to include the most recent posts. The content displayed within this block is pulled and rendered elsewhere.
Likewise, WordPress’s built-in Latest Comments dynamic block does the same with comments.

The Latest Comments dynamic block on the site frontend
Another simple example is the Site Title core block. It displays the site’s name anywhere it’s added. However, this block must be dynamic because you can set the site title via the site settings, and this block’s content must reflect that change, if any.
If you want to highlight your site’s latest comments anywhere on your site, you can use this block to do just that.
| Features | Static Blocks | Dynamic Blocks |
|---|---|---|
| Use Cases | Simple, static content that stays the same (can be edited | Content that changes often and needs to be updated automatically |
| Rendering Method | Rendered when you save the block (HTML inside post content) | Rendered at runtime (PHP callback function) |
| Performance | Fast, as there’s no server processing | Slightly slower as it is server-rendered |
| Logic | Limited to JS logic only | Full PHP logic (APIs, database, etc.) |
| Backend Language | JavaScript (React/JSX) | PHP + JavaScript |
Now that we’ve understood dynamic blocks, let’s get started with developing dynamic Gutenberg blocks in WordPress.
How To Scaffold a Dynamic Block in WordPress
To follow this tutorial, you should have a specific development environment setup and be familiar with custom Gutenberg block development. To get up to speed, refer to our previous article's Block Development Prerequisites section.
You can create dynamic blocks manually. However, like developing static custom blocks, the easiest way to scaffold a custom dynamic block is to use the create-block tool. It will generate all the necessary files and create a build process. The final result will be a plugin you can install on your WordPress site to start block development immediately.The create-block tool uses the following command to scaffold the custom block project:
npx @wordpress/create-block [options] [slug] We didn’t use any options when scaffolding our custom static block project. However, we can now use the --variant dynamic (or --variant=dynamic) argument to generate a dynamic block based on the built-in template.
Let’s name our test dynamic block simply dynamic-block. Feel free to name your custom dynamic block whatever you want!
npx @wordpress/create-block@latest --variant dynamic dynamic-block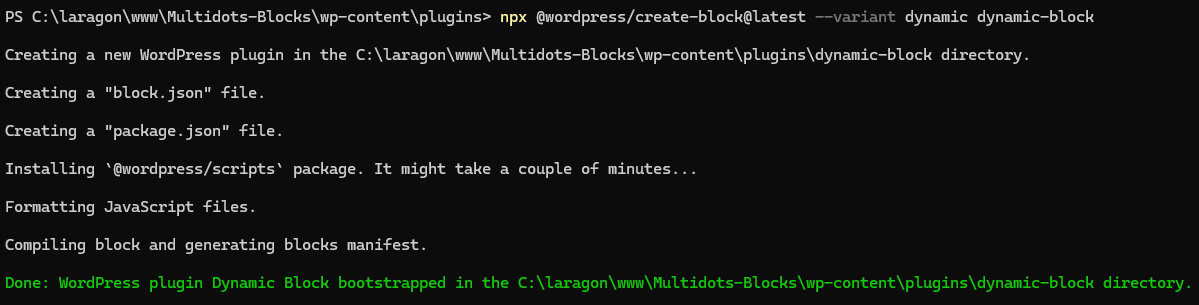
Using the create-block tool to scaffold a dynamic block
Creating the dynamic block and compiling its files may take a few minutes, so be patient. Once it’s finished, you can install the block plugin and start the project.
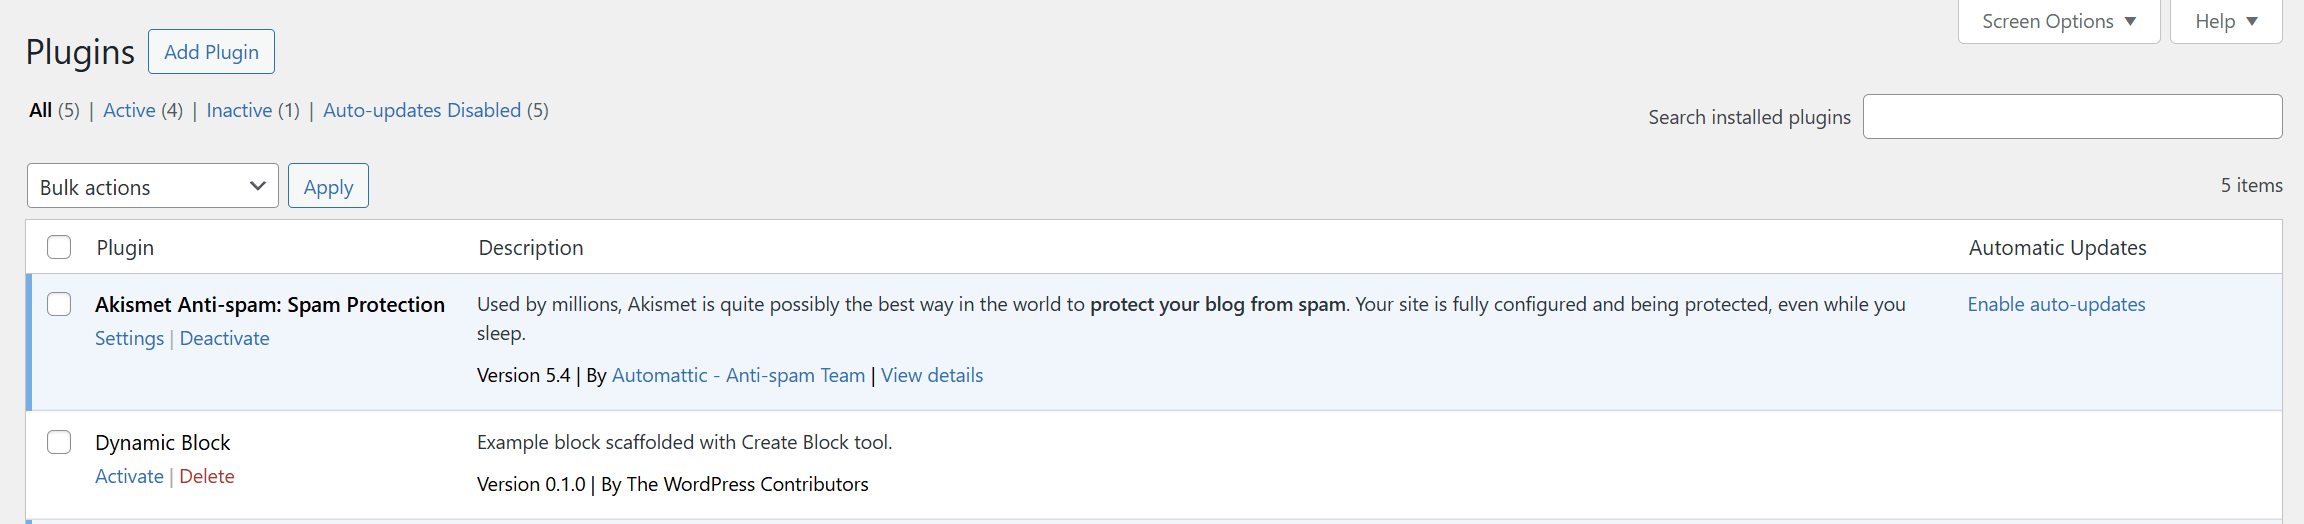
Activate the "Dynamic Block" plugin in your admin dashboard
Add the block in any of your posts or pages to test it. You should see something like this:
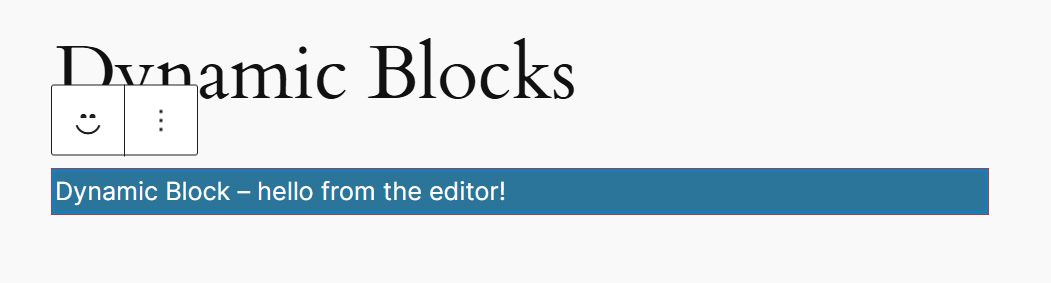
The default dynamic block in the WordPress editor
The initial block scaffolded by the create-block tool looks the same for both static and dynamic blocks, save for the text. However, as the text says, this is a dynamic block.
So, what’s the difference? The answer lies in its implementation. Let’s go ahead and figure that out.
First, use the cd command in your terminal to continue working inside this folder.
cd dynamic-blockYou can view all the files and directories generated by the create-block tool inside this plugin folder. Let’s move ahead and understand them.
Note: Refer to the official create-block Tool tutorial or the Block Editor handbook for more information about the create-block tool.
Understanding the File Structure of a Dynamic Gutenberg Block
Open the dynamic-block plugin folder in your code editor to see the dynamic block plugin’s file structure. You’ll find many files and directories here.
If you look closely at them, you’ll know they’re almost identical to a static block plugin’s file structure. However, there’s one crucial difference between them.

Static Block vs. Dynamic Block plugin file structure
The save.js file is missing from the dynamic block plugin’s file structure. It has been replaced with the render.php file instead. This file works just like the save() method in static blocks, except it’s called every time the block is rendered on the front end.
You’ll also find this file mentioned inside the block.json file under render. This tag indicates to WordPress that it’s a dynamic block and where the PHP file that renders this block is located.
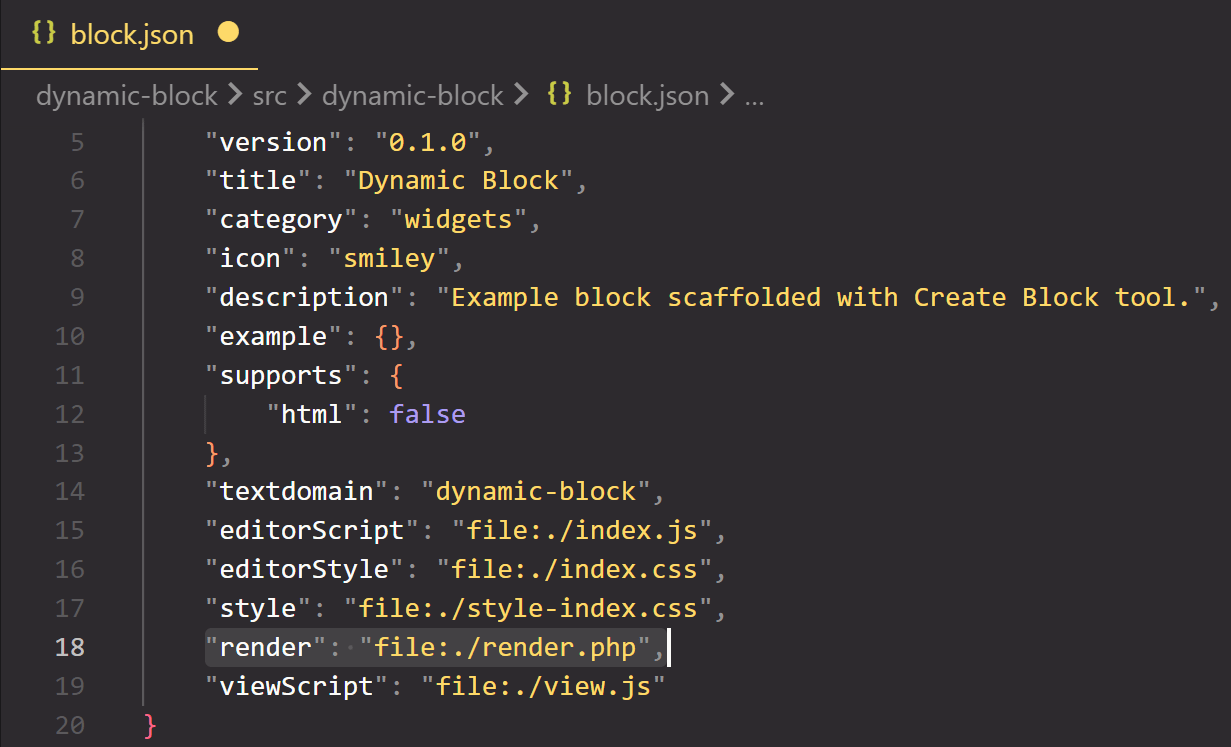
The "render.php" file in the block.json file
Let’s compare the default save.js file contents to the render.php file. Here’s what the default save.js file looks like:
export default function save() {
	return (
		<p { ...useBlockProps.save() }>
			{ 'Static Block - hello from the saved content!' }
		</p>
	);
}
The save() function above returns a static block stored in the WordPress database. It runs whenever a post or page containing the block is published or updated.And here’s what the default render.php file looks like:
<?php
/**
 * PHP file Comment
 */
?>
<p <?php echo get_block_wrapper_attributes(); ?>>
	<?php esc_html_e( 'Dynamic Block - hello from a dynamic block!', 'dynamic-block' ); ?>
</p>
This file runs on the server to render the block on the front end. Unlike save.js, it already includes localization via the esc_html_e() function, which displays translated text.
Now that you’ve understood the basics, let’s learn how WordPress processes dynamic blocks by building one.
How WordPress Processes Dynamic Blocks
You now know how to scaffold a dynamic block in WordPress. But how does it all come together in the end? Understanding that requires knowledge of multiple behind-the-scenes WordPress processes. The best way to do this is by building an example dynamic block.
Let’s build a dynamic block showing a list of selected user roles on the front and backend. This block will pull a list of users with roles chosen and display them as a list, including their username and avatar.
For example, you can use this dynamic block to list all the authors or editors on your site. That will be an excellent addition for your Our Team or About Us pages. You can filter the user roles shown to display what you want. This way, if you remove or add any authors or editors, this block will update automatically to remove or add them from the list shown.
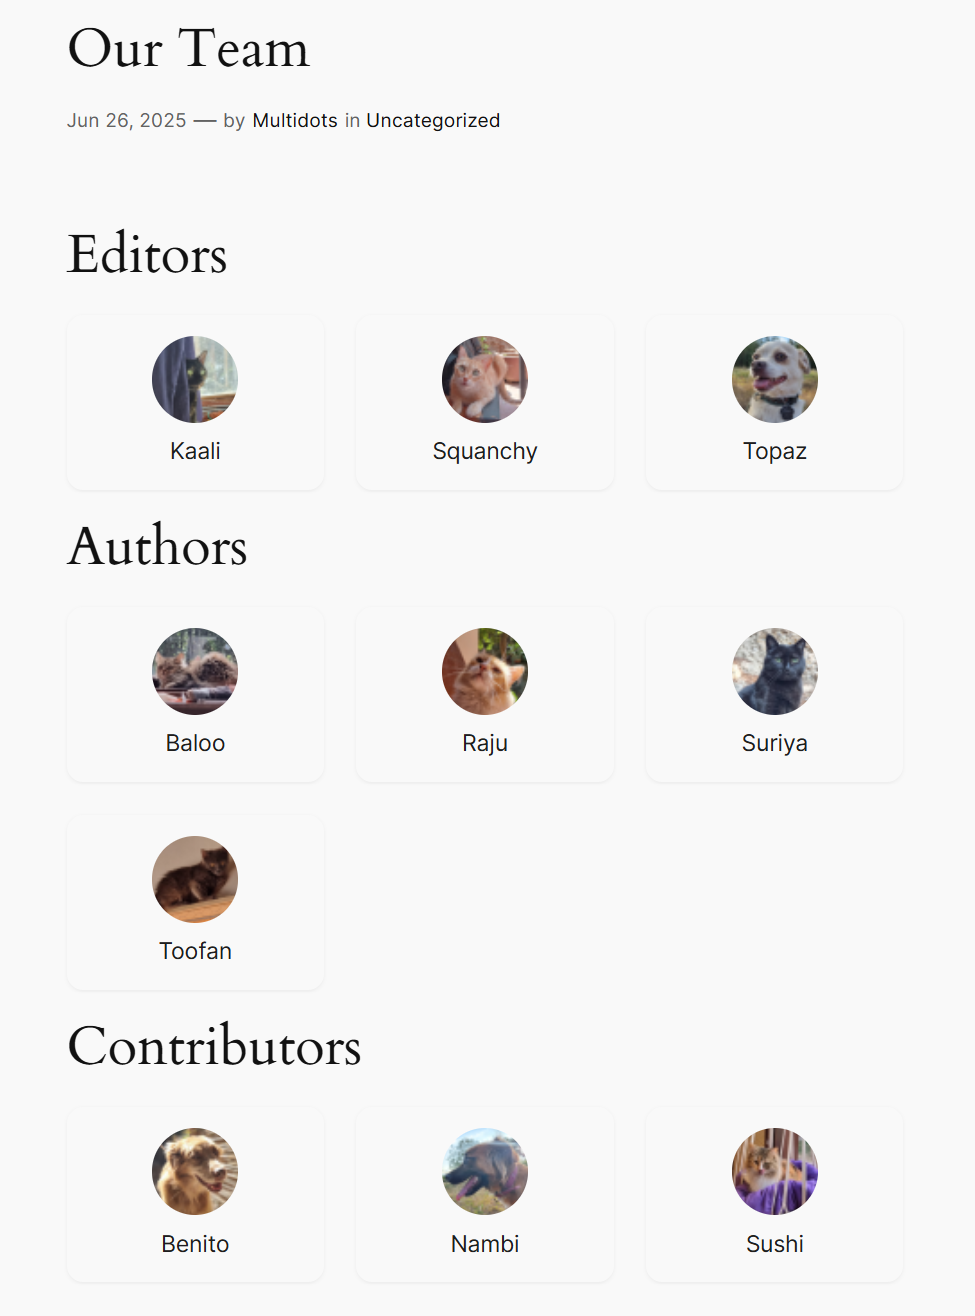
The dynamic block we’ll be creating in this tutorial
Let’s start the block development process by scaffolding the dynamic block with the create-block tool. Let’s name our block users-block.
Go to your WordPress site’s plugins folder and run the following command:
npx @wordpress/create-block@latest users-block --namespace=multidots --variant=dynamicTo avoid using the default create-block namespace, we’re using the --namespace=multidots argument to define our unique namespace. The --variant=dynamic argument tells the tool to generate a dynamic block plugin.
After the scaffolding process finishes, use the cd users-block command to move into the plugin directory and then run the npm start command to begin the development process. In this terminal, you can track the progress of block development. This process is helpful if errors occur during the automatic build stages.
Next, add the users-block plugin folder to your code editor’s workspace. We recommend using the Visual Studio Code editor. Let’s review the block development process through each file to see how it all comes together.
The users-block.php (or plugin-slug.php) File
This file registers the dynamic Gutenberg block plugin using modern block registration APIs introduced in WordPress 6.7 and 6.8. We’ve removed all the comments to keep it concise.
<?php
/**
 * Plugin Name:       Users Block
 * Description:       Dynamic users block scaffolded with the Create Block tool.
 * Version:           0.1.0
 * Requires at least: 6.7
 * Requires PHP:      7.4
 * Author:            Multidots
 * License:           GPL-2.0-or-later
 * License URI:       https://www.gnu.org/licenses/gpl-2.0.html
 * Text Domain:       users-block
 *
 * @package Multidots
 */

if ( ! defined( 'ABSPATH' ) ) {
	exit; // Exit if accessed directly.
}


function multidots_users_block_block_init() {
		if ( function_exists( 'wp_register_block_types_from_metadata_collection' ) ) {
		wp_register_block_types_from_metadata_collection( __DIR__ . '/build', __DIR__ . '/build/blocks-manifest.php' );
		return;
	}

		if ( function_exists( 'wp_register_block_metadata_collection' ) ) {
		wp_register_block_metadata_collection( __DIR__ . '/build', __DIR__ . '/build/blocks-manifest.php' );
	}
		$manifest_data = require __DIR__ . '/build/blocks-manifest.php';
	foreach ( array_keys( $manifest_data ) as $block_type ) {
		register_block_type( __DIR__ . "/build/{$block_type}" );
	}
}
add_action( 'init', 'multidots_users_block_block_init' );
The multidots_users_block_block_init() function hooks into the init action and registers the block efficiently.
The wp_register_block_types_from_metadata_collection() function was introduced in WordPress 6.8 and allows plugins to register one or more block types with a single function. That’s done by compiling all the block metadata into a single PHP manifest file—it is the blocks-manifest.php file with the create-block tool.
This method is highly efficient and improves performance as you don’t have to include multiple register_block_type() calls for every block type you want to include in your plugin.
The plugin file also includes the wp_register_block_metadata_collection() (for WordPress 6.7) and register_block_type() (for WordPress 6.6 and lower) functions to make it backward compatible with previous WordPress versions.
You can edit the plugin name, description, version, author, etc., here. Next, install and activate the plugin in your WordPress admin dashboard.
Currently, the plugin looks precisely like the dynamic block we scaffolded before. But once we make a few changes, that will soon change.
The block.json File
Move into the src folder now and open up the block.json file. This JSON metadata file is how WordPress registers and understands the block. It defines what the block does, what features it supports, and what assets it needs to load.
{
	"$schema": "https://schemas.wp.org/trunk/block.json",
	"apiVersion": 3,
	"name": "multidots/users-block",
	"version": "0.1.0",
	"title": "Users Block",
	"category": "widgets",
	"icon": "admin-users",
	"description": "Dynamic block scaffolded with the Create Block tool to generate a list of selected user roles.",
	"example": {},
	"attributes": {
		"role": {
			"type": "string",
			"default": "author"
		}
	},
	"supports": {
		"html": false,
		"color": {
			"background": true,
			"text": true
		},
		"align": [
			"wide",
			"full"
		],
		"spacing": {
			"padding": true,
			"margin": true
		}
	},
	"textdomain": "users-block",
	"editorScript": "file:./index.js",
	"editorStyle": "file:./index.css",
	"style": "file:./style-index.css",
	"render": "file:./render.php",
	"viewScript": "file:./view.js"
}
The first few lines of the JSON file define the basic block metadata, such as its name, version, title, category, icon, and description. We’ve edited its description and changed its dashicon from the default smiley to admin-users.
Next, we define block attributes that the dynamic block will use. As we’ll be querying user roles, let’s name this block attribute simply role. It will hold the user role the block should query (author, subscriber, editor, etc.). It’s a string type whose default value is set to author.
After that, we declare the required block supports, which define how the block appears inside the editor.
"html": false:Prevents users from switching to HTML mode for this block.color.background & color.text:Enables background and text color controls in the block sidebar.align: ["wide, "full"]:Adds wide and full-width alignment options in the block’s toolbar.spacing.padding&spacing.margin:Enables padding and margin controls in the sidebar.
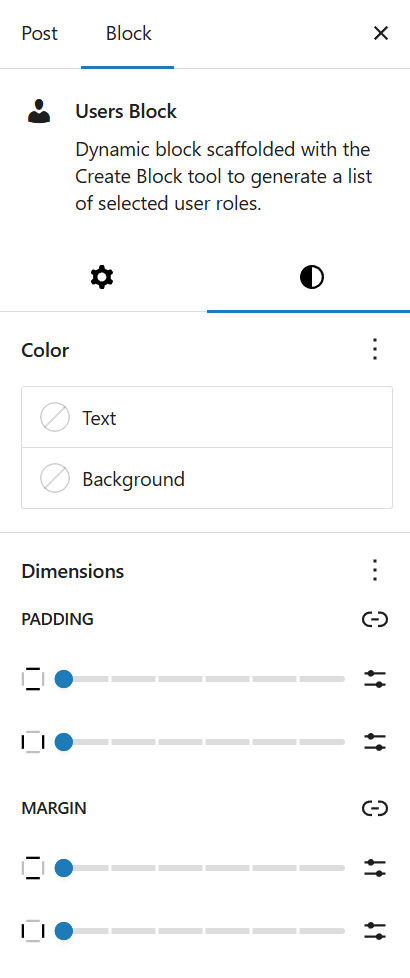
The Color and Spacing (Dimensions) settings in the block’s sidebar
Finally, the block.json file declares the asset configuration files:
- editorScript: The JS file loaded in the block editor (typically includes
registerBlockTypeandedit()logic). Theindex.jsfile handles the logic here. - editorStyle: These CSS styles are loaded only in the editor to customize the editor UI. They will override any other styles defined otherwise.
- style: These CSS styles are loaded on both the frontend and the editor — shared styling like layout or font size. We recommend removing the default styles the create-block tool adds to the
style.scssandeditor.scssfiles so that you can start with a clean slate. - render: This is the key that makes the block "dynamic." It declares the PHP file (
render.php) used to render the block dynamically. - viewScript: This JS file loads only on the frontend. It’s useful for adding animations, AJAX, etc. You can remove it if you’re not using any frontend JavaScript for your block.
And that’s pretty much it. Next, let’s move to the index.js file.
The index.js File
The index.js file is the entry point for your Gutenberg block’s scripts. It registers the block metadata from block.json, connects to the block's editor interface, and ensures styles are correctly applied.
Again, we’ve truncated the comments to keep the code concise.
import { registerBlockType } from '@wordpress/blocks';

import './style.scss';

/**
 * Internal dependencies
 */
import Edit from './edit';
import metadata from './block.json';

registerBlockType( metadata.name, {
	/**
	 * @see ./edit.js
	 */
	edit: Edit,
} );
First, it imports the registerBlockType component from the core Gutenberg @wordpress/blocks package. It includes the function necessary to register your custom block type.
Next, it imports the style.scss file, which is automatically compiled via Webpack to CSS and listed as style-index.css in the build folder.
Note: Editor-specific styles (editor.scss) are imported in the edit.js file. We’ll discuss this file next.
Then it imports internal dependencies, such as the Edit() function and block metadata. Typically, you’ll see both an Edit() and a save() function here. But since this is a dynamic block and you’re not saving any HTML content to the post content, you’ll only see the Edit() function mentioned here.
And lastly, it registers the block using the registerBlockType() function. In our case, the metadata.name value will be multidots/users-block. The edit: Edit configuration hooks into the editor UI.
Usually, you don’t touch anything in the index.js file unless you need to. The above explanation is only to help you understand how WordPress processes block registration.
The edit.js File
The edit.js file is where we build our block’s editing experience. It defines how the block appears and behaves in the block editor. For example, the configuration options that are shown to the users (like which user role to select). The default edit.js file looks like this:
import { __ } from '@wordpress/i18n';

import { useBlockProps } from '@wordpress/block-editor';

import './editor.scss';

export default function Edit() {
	return (
		<p { ...useBlockProps() }>
			{ __(
				'Example Dynamic Block - hello from the editor!',
				'example-dynamic-block'
			) }
		</p>
	);
}
Here’s a breakdown of the code:
- The __ component from @wordpress/i18n is used for internationalization (i18n). To use it, you must wrap all user-facing strings with its __() function to translate them appropriately. We’ll cover this later.
- The
useBlockProps()hook supplied by the @wordpress/block-editor package defines the outer markup of your block inside the Edit component. It adds all the necessary properties to a block, such as assigning a unique id, className, data attributes, etc. - The
editor.scssfile loads block-specific styles used only in the block editor (i.e., not on the frontend). - The
export default function Edit()is the primary React component for your block in the editor. It can take optional arguments, such as the attributes we defined earlier in theblock.jsonfile, and an onChange function to refresh the attributes after user selection.
Currently, the block only includes a default <p> paragraph tag with some static content. Let’s change that.
For our dynamic block, let the users choose from a set of user roles and render those users as a list. We need to define our custom fields for that and then render them.
Decide where you want the users to see these options. The block’s sidebar panel is almost always an ideal choice. To do this, we need to hook into the block's sidebar panel and add a dropdown menu from which users can select a user role.
You can render a block’s sidebar panel with the InspectorControls component. You can add any content inside this component, and the block editor will add it to your block’s sidebar.
WordPress also includes other helpful UI components, such as Panel, PanelBody, and PanelRow, to build the block sidebar. And lastly, the SelectControl component adds a dropdown select menu from which you can choose a user role. You can import all these components together like this:
import { useBlockProps, InspectorControls } from '@wordpress/block-editor';
import { Panel, PanelBody, PanelRow, SelectControl } from '@wordpress/components';
Now, let’s build the Edit() function structure.
export default function Edit({ attributes, setAttributes }) {
	return (
		<>
			<InspectorControls>
				<Panel>
					<PanelBody title={__("Set User Role", "user-blocks")}>
						<PanelRow>
							<SelectControl />
						</PanelRow>
					</PanelBody>
				</Panel>
			</InspectorControls>
			<ul {...useBlockProps()}>List of Users goes here</ul>
		</>
	);
}- The
Edit()function is the default export of the block’s edit component. It includes two props:- attributes: The current values of the block’s attributes.
- setAttributes: The function that updates the attribute values above when the user interacts with the block.
- The InspectorControls component slots inside an empty React fragment and includes the following components:
- Panel: An outer wrapper for the component’s sidebar. You can give a header props to this component.
- PanelBody: This creates a collapsible section named Settings in the sidebar. The name is defined via the title property. You can also define other properties here, such as icon, opened, onToggle, initialOpen, etc.
- PanelRow: This component defines a UI row inside the Panel component. It makes the panel rows prettier by making them a flex container with a default top margin.
- SelectControl: This self-closing component lets the user choose from a list of options, such as user roles. It needs other properties, such as label, value, options, and onChange.
- The
<ul {...useBlockProps()}>unordered list component is outside the InspectorControls component. Hence, it is rendered as the block’s central visible part in the editor. We’re using a <ul> tag here as the frontend also uses the same to list users. The placeholder text serves only as an example here to test the block in the editor.
Save the edit.js file and ensure no errors occur in the build process. Now, add the block to any post on your site and see how it appears in the editor.
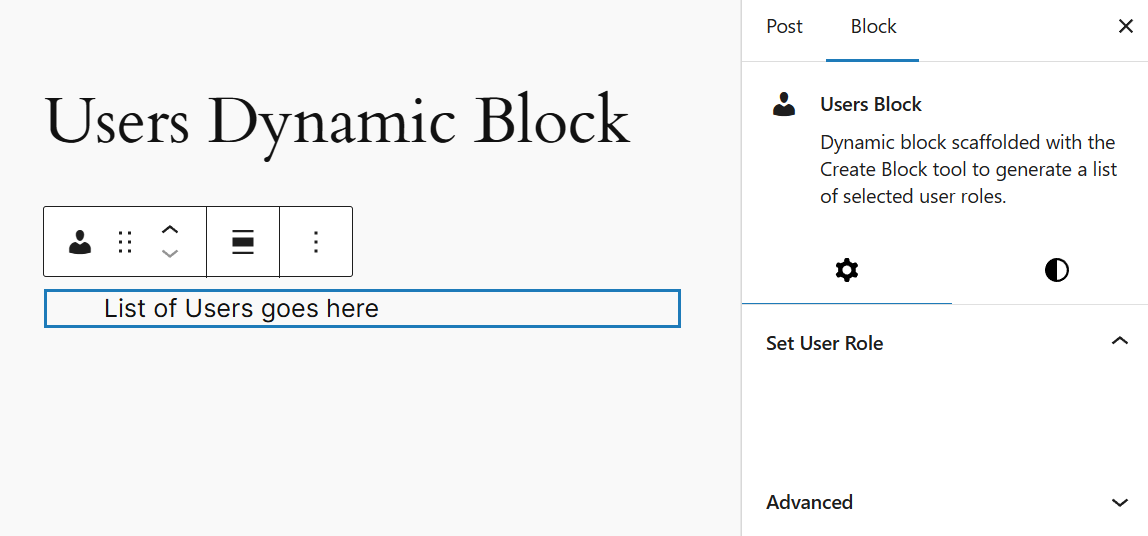
Our basic dynamic block in the editor
The Set User Role tab is visible in the sidebar panel. However, it appears empty because we haven’t yet defined the SelectControl properties in its component. Let’s do that now.
<SelectControl
	label={__("User role", "user-blocks")}
	value={attributes.role}
	options={[
		{ label: __("Contributor", "user-blocks"), value: "contributor" },
		{ label: __("Author", "user-blocks"), value: "author" },
		{ label: __("Editor", "user-blocks"), value: "editor" },
		{ label: __("Administrator", "user-blocks"), value: "administrator" },
		]}
	onChange={(role) => setAttributes({ role })}
/>
Note: All the user-facing strings here are internationalized via the __() internationalization function. The user-blocks keyword is our plugin’s text domain and appears as such here.
- The label property sets the label above the dropdown menu in the block’s sidebar. Here, we define it simply as User role.
- The value property sets the currently selected value in the dropdown. Here, we set it to the
attributes.roleattribute. - The options property takes an array of objects, each with its own label and value. We define four options: Contributor, Author, Editor, and Administrator. Behind the scenes, their respective value is stored as the current
attributes.rolevalue. For example, if you choose the Author user role, then its value author is the currentattributes.role. - The
onChange()event handler function runs when the user changes the selected user role from the dropdown menu. It calls thesetAttributes({ role })function, which updates the block’s internal state and triggers a re-render.
That’s how you allow users to select a user role. Save the edit.js file and see how the block appears in the editor now.
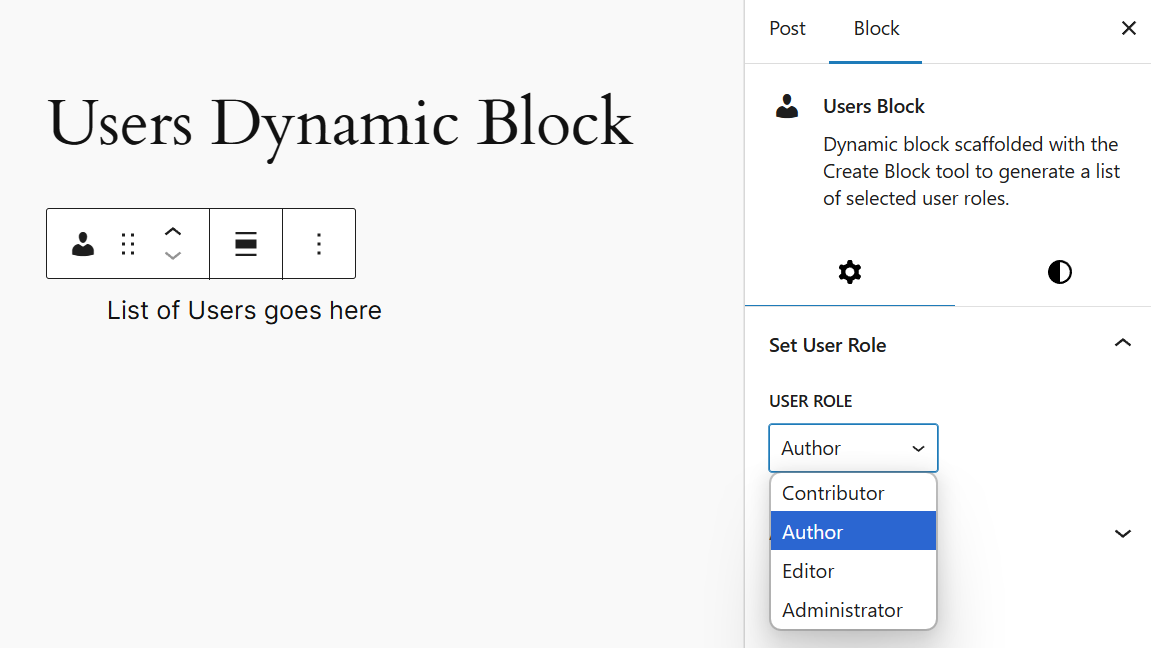
Setting a "User Role" in the block’s sidebar panel
You can now select from a list of user roles in the block’s sidebar panel.
Currently, these values do nothing, as you haven’t instructed WordPress what to do with them yet. If you save the post and check the frontend, you will see the default content because you haven’t yet added anything to the render.php file. So let’s jump over to render.php and check it out.
The render.php File
You’ll notice a stock PHP file with a paragraph tag enclosing an echo get_block_wrapper_attributes() function. That’s the default text you see on the block’s frontend.
<?php
?>
<p <?php echo get_block_wrapper_attributes(); ?>>
	<?php esc_html_e( 'Example Dynamic Block - hello from a dynamic block!', 'example-dynamic-block' ); ?>
</p>
As we want this to be a list of authors with their name and profile picture, let’s change the <p> tag to <ul>.
We now need to fetch users by their respective roles. You can do this via the core WP_User_Query {} class. Depending on your query, it returns an array of user IDs, WP_User objects, or stdClass objects. For example, if you want to fetch all the Subscriber role users, the query will be:
$user_query = new WP_User_Query(
    array(
        'role' => 'Subscriber'
    )
);
In our case, the user selects the role in the block editor. This value is stored as block attributes, and you can retrieve it via $attributes["role"]. Furthermore, you can pass additional parameters here to sort the users retrieved.
Let’s build our user query inside the opening PHP tag. We’ve named it $authors. The retrieved user objects are sorted by their display names in ascending order. We can also restrict the maximum number of users retrieved to 12. You can also let users select this number in the block settings.
$authors = new WP_User_Query(
	array(
		"role" => $attributes["role"],
		"orderby" => "display_name",
		"order" => "ASC",
		"number" => 12,
	)
);
Feel free to customize the parameters according to your requirements. Next, you need to retrieve the array of user objects from the query.
$authors = $authors->get_results();The result is an array of WP_User objects based on the selected role. We’ve got what we want to display. Now we must pass it on to the <ul> tag below.
<ul <?php echo get_block_wrapper_attributes(); ?>>
	<?php
	if ( $authors ) :
	?>
		<?php foreach ( $authors as $author ) : ?>
			<li>
				<a href="<?php echo esc_url( get_author_posts_url( $author->ID ) ); ?>">
					<?php echo get_avatar( $author->ID, 48 ); ?>
					<?php echo esc_html( $author->display_name ); ?>
				</a>
			</li>
		<?php endforeach; ?>
	<?php endif; ?>
</ul>
Here’s a breakdown of the code above:
- Check if any users are returned at all using the
<?php if ( $authors ) : ?>condition. The function will end immediately if no users have the selected user role. - If any users are returned, loop through them with the
<?php foreach ( $authors as $author ) : ?>condition and output a <li> list item for each user. - Each list item includes the following:
- get_author_posts_url(): The list item is linked to the user’s archive page.
- get_avatar(): Displays the user’s avatar with a 48px square size. WordPress uses Gravatar as the user’s display picture by default, but you can always set a custom user avatar.
- display_name: Shows the user’s full name.
- The
esc_url()andesc_html()functions are part of WordPress's best practices to avoid security mishaps.
Using the above PHP code, here’s an example HTML output for the frontend render:
<ul class="wp-block-multidots-users-block alignwide">
	<li>
		<a href="https://yoursite.com/author/john/">
			<img src="https://gravatar.com/avatar/..." />
			John Doe
		</a>
	</li>
	<!-- More authors... -->
</ul>
We’ve added a bunch of fake users with various user roles to test this out. Add three instances of the dynamic block to your post or page, with a different User Role setting chosen for every instance:
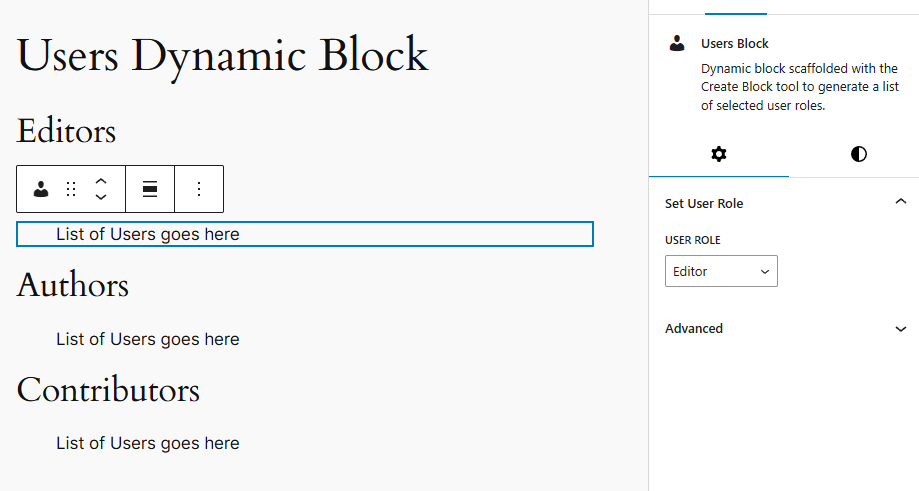
Three instances of the users dynamic block with different User Role settings
Save the post and see how it appears on the frontend. You should see something like this:

List of users shown on the frontend
If you add any or remove users belonging to the above user roles, this list will update automatically to reflect that change.
The styling of the list items in our dynamic block seems a bit off. Let’s make it neater and prettier by adding some custom CSS.
The style.scss File
Plan how you want to order the list, and then design it in CSS. We will eliminate the bullet points and arrange the user profiles to appear next to one another in a grid. To achieve this, we can use CSS Grid layout.
Open the style.scss file, and you’ll notice the .wp-blocks-multidots-users-block class name, which is our block’s parent class. Any custom styling you want to apply to this block goes inside there.
First, you apply the CSS grid property to the entire block:
.wp-block-multidots-users-block {
  display: grid;
  gap: 1.5rem;
  list-style: none;
  padding: 0;
  margin: 0;
  grid-template-columns: repeat(auto-fit, minmax(180px, 1fr));
}
- The display: grid property converts the <ul> tag into a CSS Grid container, letting us lay out the <li> items (the user profiles) in columns.
- The gap: 1.5 rem property adds spacing between the grid items (rows and columns).
- The list-style: none property removes the default bullet points (or discs) from the <ul> items.
- Setting the padding and margin to 0 removes the default spacing around the list.
- Finally, you make the grid responsive using the grid-template-columns: repeat(auto-fit, minmax(180px, 1fr)) property. It creates as many columns as can be fit in the screen width (auto-fit), with a minimum column width of 180px and a flexible maximum of 1fr, so it adjusts to the available space.
Next, you style each <li> list item within the class, like so:
li {
  background: #f9f9f9;
  border-radius: 12px;
  padding: 1rem;
  text-align: center;
  transition: box-shadow 0.3s ease;
  box-shadow: 0 1px 3px rgba(0, 0, 0, 0.05);
}
The box-shadow slightly elevates the list item, creating a card-like effect.
We can also add a hover effect for each list item. When the user hovers over a user card, the shadow becomes deeper and more noticeable, giving a "lifted card" effect for better user interactivity. Adding the transition property to the li item makes the hover shadows animate smoothly.
&:hover {
  box-shadow: 0 4px 10px rgba(0, 0, 0, 0.08);
}
We can now style the <a> anchor tags inside each <li>.
a {
  display: flex;
  flex-direction: column;
  align-items: center;
  text-decoration: none;
  color: #1e1e1e;

  &:hover {
    color: #007cba;
  }
}
The flex properties vertically stack the user avatar and name. The other properties horizontally center both the elements, remove the underline from links, set a neutral color to the link, and then add a text hover color for accessibility and brand management. Feel free to use the colors you want.
And finally, you style the <img> user avatar.
img {
  border-radius: 50%;
  margin-bottom: 0.5rem;
  width: 64px;
  height: 64px;
  object-fit: cover;
}
This styling makes the avatar a perfect circle and adds space between the user avatar and name. The width and height are fixed for consistency, and the object-fit: cover property ensures that the circle is filled without distortion or letterboxing.
For futureproofing, if you choose to wrap the user name in other tags, you can add other fallback tags here.
span,
strong,
div {
  font-size: 1rem;
  font-weight: 600;
}
Save the styles file and refresh your site’s frontend. Your list should now be much cleaner.
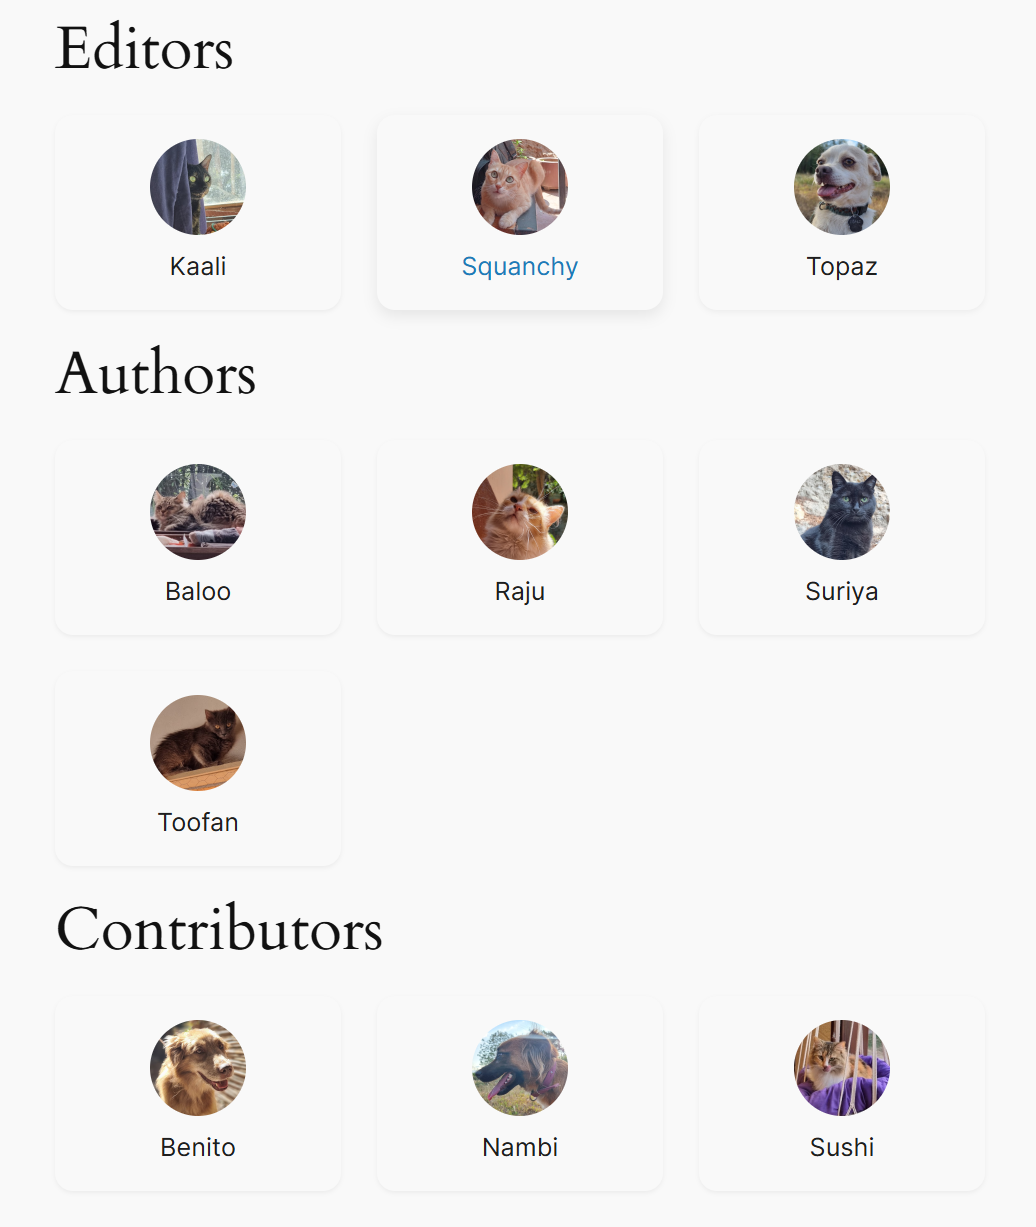
Our stylized dynamic list of users with various roles
Notice the hover effect on one of the cards in the Editors row.
This grid layout works well and is responsive, adjusting its column count based on screen width. You can easily extend it by adding post counts, user bio, etc., and it’ll still look clean.
Making The Block Dynamic on the Backend
The hard part now is getting the same to work on the WordPress backend. We only have the <InspectorControls> component doing any meaningful stuff for the dynamic block in the block editor. It takes care of the sidebar settings.
However, our dynamic block still shows the same static message inside the editor. But we need to show the same user query on the backend and dynamically update it.
How can we do that when we cannot write any PHP here? This part is the trickiest part of dynamic block development, and there are two ways to render content inside the block editor. One is an outdated fallback method, which we’ll handle first, then look at the modern approach.
The ServerSideRender Component
The ServerSideRender component displays the output of a dynamic block on the block editor by rendering it via a PHP function on the server.
Whenever you insert or change a dynamic block, ServerSideRender will run to the server, run the render.php file, build its HTML output from scratch, and inject it into the block content in the block editor. That means the server will be tasked with rerunning the file whenever you make any changes to the block, whether a simple attribute change or a new color setting.
Note: The ServerSideRender component isn’t recommended for rendering your dynamic block in the block editor. However, if you’re just testing your block, it’s super complex with many components, or you’re finding it difficult to do so, this is an acceptable fallback.
Here’s how it works:
import ServerSideRender from '@wordpress/server-side-render';

const Edit = ( props ) => {
	return (
		<ServerSideRender
			block="namespace/block-name"
			attributes={ props.attributes }
		/>
	);
};
First, you import the ServerSideRender component in the edit.js file and pass it to the Edit() function with the block’s attributes. Behind the scenes, the component sends an AJAX request to the WordPress REST API, getting the HTML generated by the render.php file here (or the render_callback function in older versions).
So, our Edit() function will become like below. We’ve truncated the InspectorControls code here to keep it short.
import ServerSideRender from '@wordpress/server-side-render';

export default function Edit({ attributes, setAttributes }) {
	return (
		<>
			<InspectorControls>
                    ...
                    ...
                    ...
			</InspectorControls>
			<ServerSideRender
				block="multidots/users-block"
				attributes={attributes}
			/>
		</>
	);
}
Save the edit.js file and refresh the post editor where you’ve added your blocks. It should now resemble the frontend, with a list of users. As we’ve added the styles to the style.scss sheet, you’ll also see the same design here.
The dynamic block in the block editor
If you change the User Role settings of any block instance in its sidebar settings, the block should update automatically in the block editor.

Updating "User Role" settings in the block editor
That’s pretty much it. ServerSideRender is convenient to use and easy to implement. However, it comes with some serious drawbacks:
- Poor user experience: Because it has to wait for the server to respond, it introduces latency between making a change and seeing it reflected.
- Increased server load: Sending a request to the server for every change can become taxing if it’s done too often, or you have a lot of users doing the same. Furthermore, it relies heavily on AJAX/REST API calls, so the block may appear broken or fail to render if something fails (network hiccups, auth issues, etc.).
- Less control over the editor experience: You only get the static HTML output back and cannot customize the block independently from the frontend
- Inconsistent: Many Gutenberg features expect the editor view to be rendered via React and be interactive. Since this depends on server-side PHP logic, you’ll not have access to most of those features.
Let’s ditch ServerSideRender and see how we can use modern Gutenberg development practices to render our dynamic block in the editor.
The @wordpress/core-data Package
Let’s build the backend of this dynamic block using the @wordpress/core-date package. This function results in the same output as above, but it runs client-side to render the block preview, so you don’t tax the server much. It’s also decoupled from the frontend render.php file, so you can build it independently, making it appear slightly different, if you want.
We’ll use the useEntityRecords component to fetch users via the REST API and render them inside the editor with React. This custom Reach Hook can fetch almost any WordPress data and perform CRUD operations.
First, import the component from the @wordpress/core-data package in the edit.js file.
import { useEntityRecords } from "@wordpress/core-data";Next, fetch the user data using the useEntityRecords() function. As it’s a React Hook, you must call it at the top level of the component. Inside the Edit() function, before passing the return statement, define the following:
const { records, isResolving } = useEntityRecords("root", "user", {
  per_page: 12,
  roles: attributes.role,
});
Notably, the UseEntityRecords function accepts various parameters. Here, root is the entity source for the entity type user. Then, you pass the per_page and roles queries under another object. You can find these arguments and other possibilities in the REST API Handbook.
Ultimately, this returns an array of user objects called records. Finally, you also include an isResolving boolean to indicate whether the data is still loading.
The Inspector Controls component remains the same. Whenever you update the attributes.role value, it triggers a new fetch via useEntityRecords(). Once the records value is fetched, it’s time to render a <ul> list. In React, you do it like so:
{records && (
  <ul>
    {records.map((record) => (
      <li key={record.id}>
        <a href={record.link}>
          <img
            src={record.avatar_urls[48]}
            alt={`Profile image of ${record.nickname}`}
          />
          {record.nickname}
        </a>
      </li>
    ))}
  </ul>
)}
Essentially, what it’s doing here is rendering the same output as in the render.php file, except with React. You take the records and build a <ul> list with <li> items, each with a user avatar and nickname. You’re also setting the avatar size here, just like you did before.
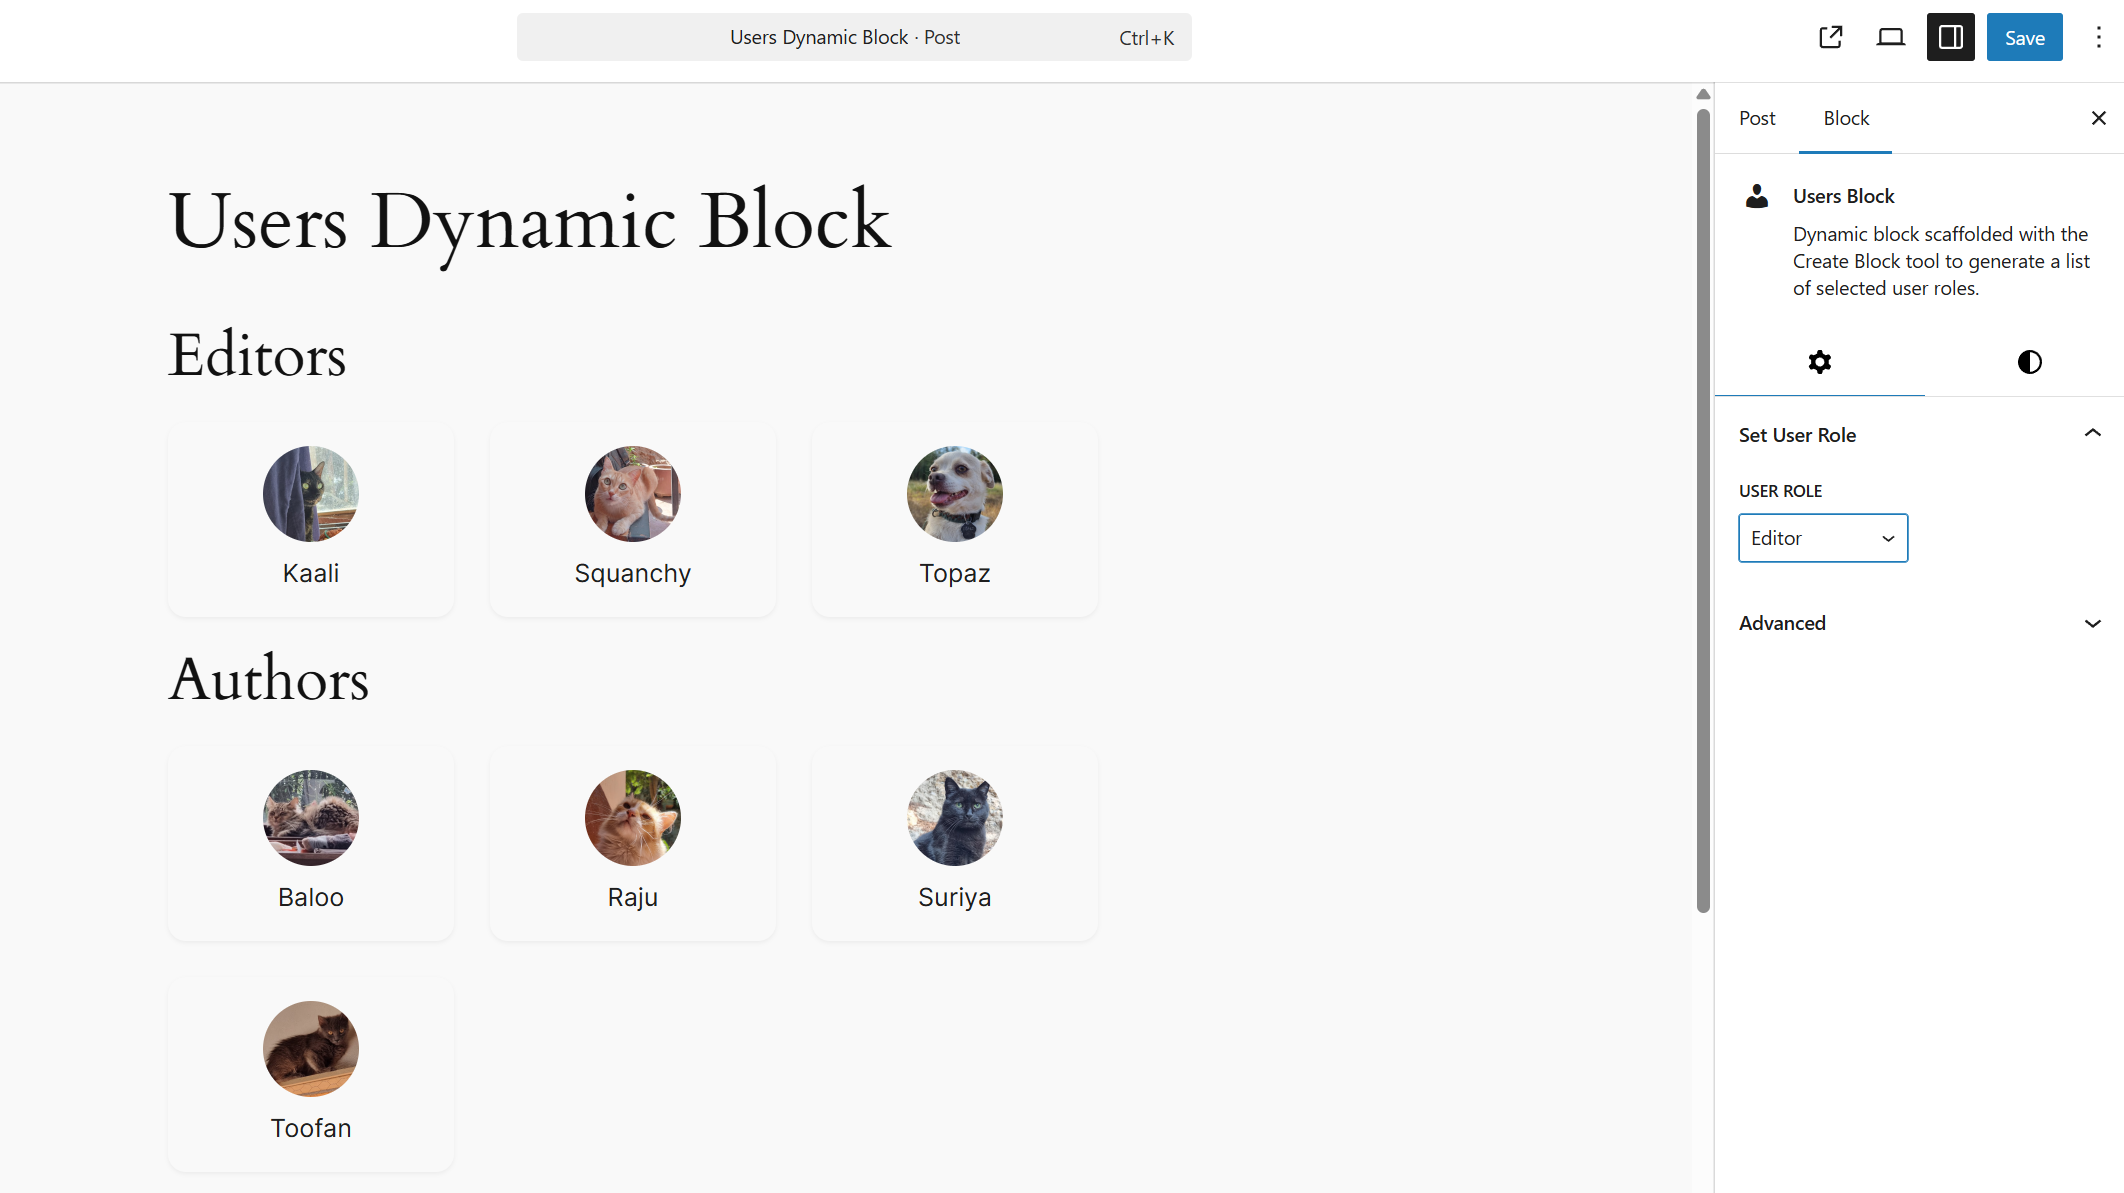
Save the edit.js file and refresh your block editor. You’ll see a render with no style, which differs from the render.php output. To correct that, you must pass the className="wp-block-multidots-users-block" argument to the <ul> tag. Alternately, you can also pass the useBlockProps() component inside the <ul> element. After that, your frontend and backend renders will be identical again.
The primary benefit of doing backend rendering this way is that it’s faster, more interactive, and more efficient.
You can further enhance this dynamic block with more features, such as adding pagination buttons, showing user post counts and bios, and having a setting to select the number of users displayed.
By building this example dynamic block, you’ve now understood how WordPress processes them behind the scenes, both on the front and backend.
Unlock the Power of Dynamic Gutenberg Blocks
Dynamic Gutenberg blocks in WordPress are essential for building advanced, scalable, and flexible content solutions. Using them, you can create highly customized solutions like directory listings, personalized dashboards, API-integrated blocks, real-time data, and more.
Furthermore, they make managing content on WordPress much easier by improving the editorial flow, which is especially useful for websites that publish large volumes of time-sensitive or data-driven content.
Using dynamic blocks, editors and site administrators can configure content through the block interface, while developers maintain control over rendering, performance, and security. This separation enhances workflow efficiency, enabling more flexible, scalable, and maintainable WordPress solutions.
Want to unlock WordPress's full potential with tailored Gutenberg solutions built for your business? Let’s connect!
Schedule a consultation call and discuss your migration requirements.
Contact Us